Some classrooms have been upgraded to include Audio/Visual (A/V) equipment to assist with onsite and remote instruction. A classroom with these upgrades is known as a “Tier 2 classroom.” A list of the classrooms can be found at the following link: Multimedia Classrooms: Classroom Technology Upgrade Project.
Most of the equipment operates without user intervention and cannot be adjusted.
Referenced below are some quick links to using common A/V equipment in Tier 2 Multimedia Classrooms:
Tier 2 Classroom Technology Instructions Quick Start Guide
Each Tier 2 room is equipped with:
- Podium PC with 1 or 2 monitors
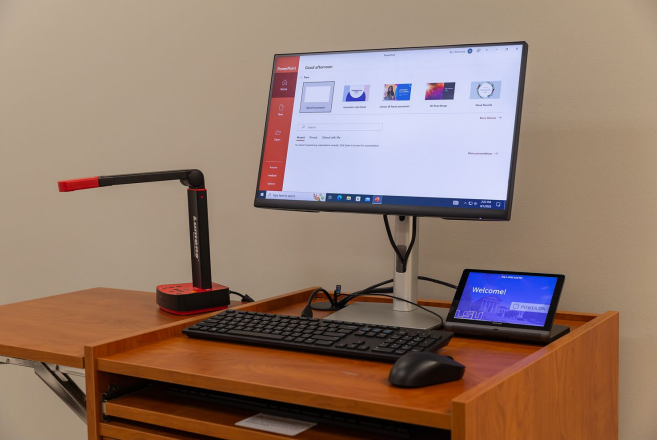
- Touchscreen
- Document Camera
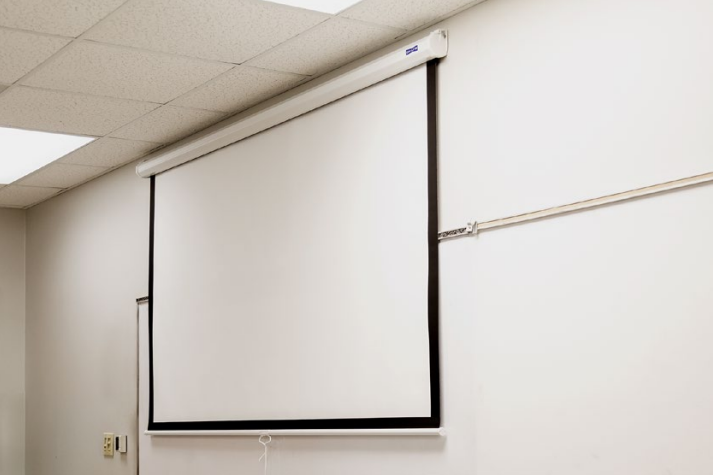
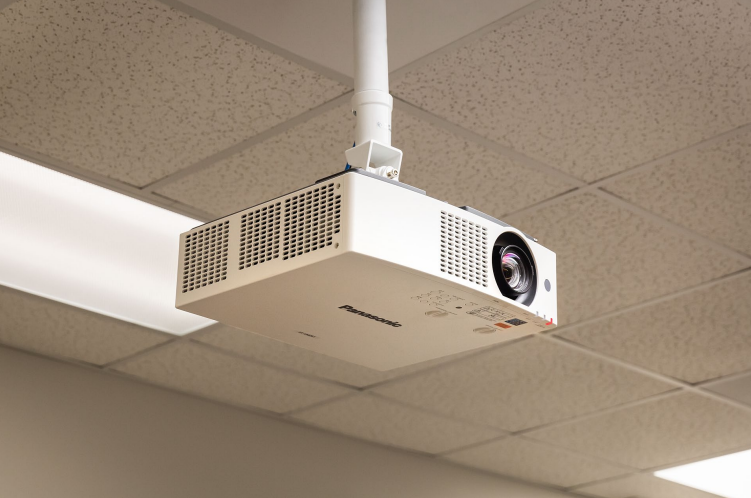
- Projector or big screen display
- Speakers
- Wireless Display (screen share)
[back to top]
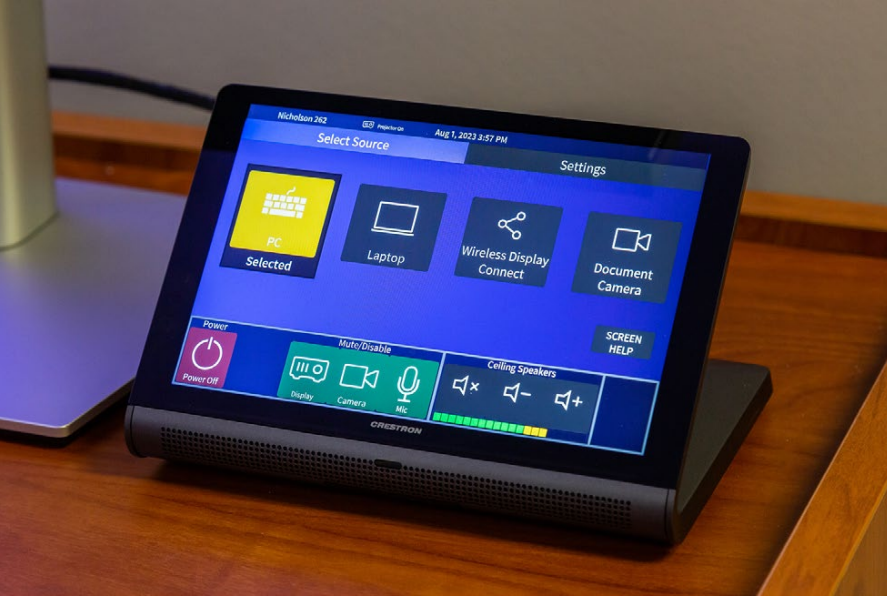
1. Logon to the PC with your LSU credentials. (Note: You may have to wiggle the mouse to have the PC monitor display.)
2. Touch the Power On icon on the touchscreen.
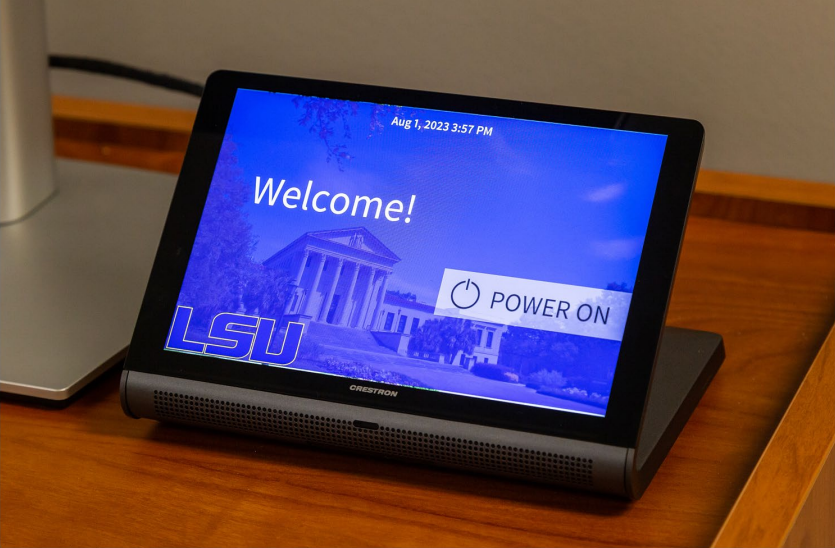
3. Press PC on the touchscreen (may already be selected).
4. The PC contents will be displayed on the projection screen.
[back to top]
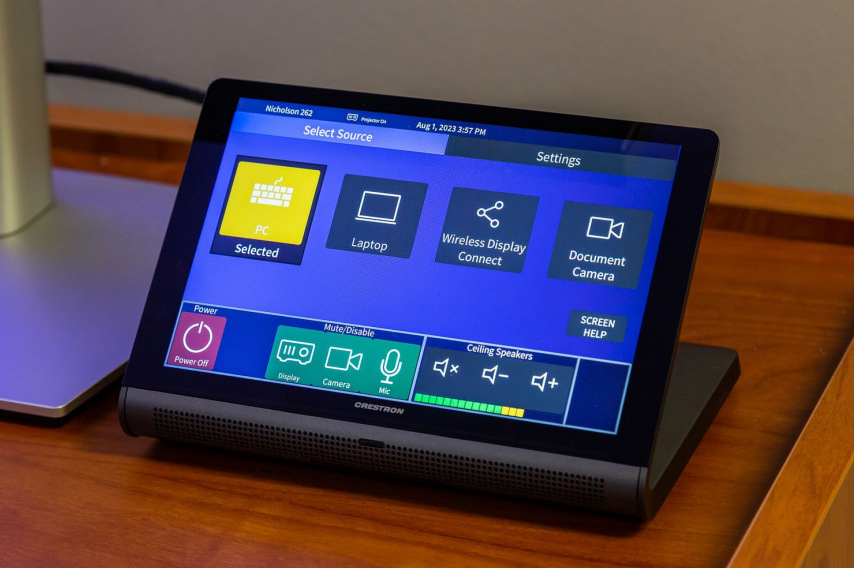
1. If you want to temporarily mute what the students see, press the Display icon on the touchscreen.
2. The Display icon turns red with an X.
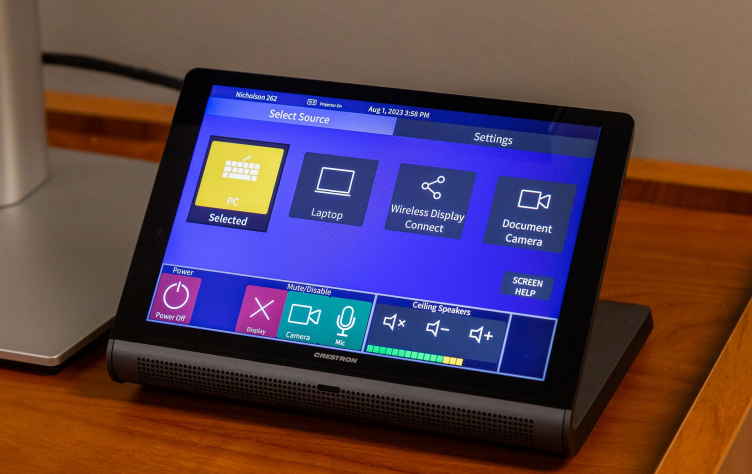
3. The projector image will be muted.
4. Press the Display icon again to unmute.
[back to top]
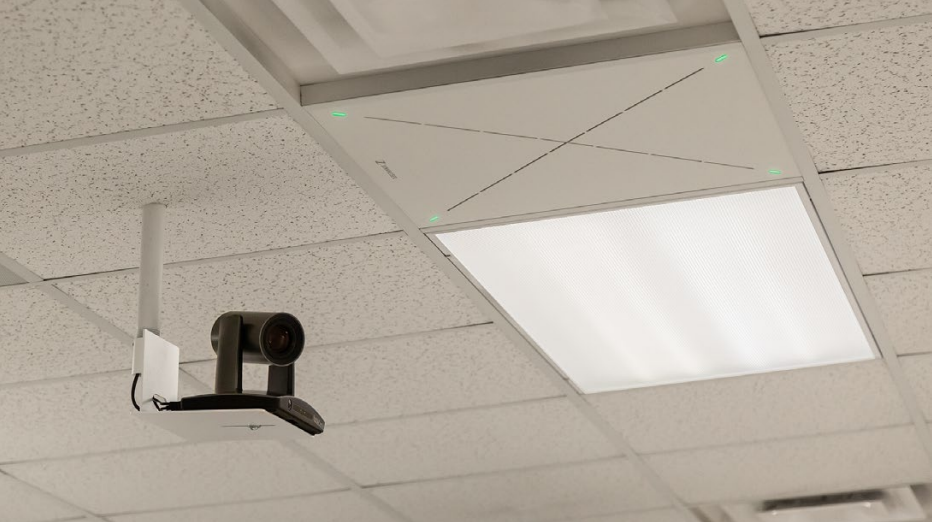
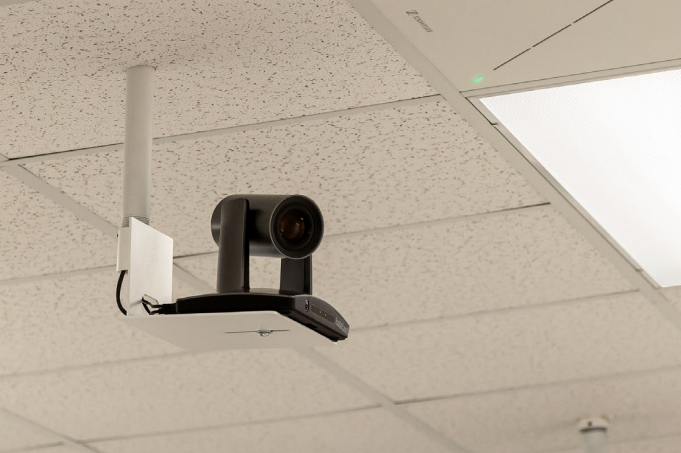
1. If you want to stop the camera from auto-tracking your movement, press the Camera icon on the touchscreen.
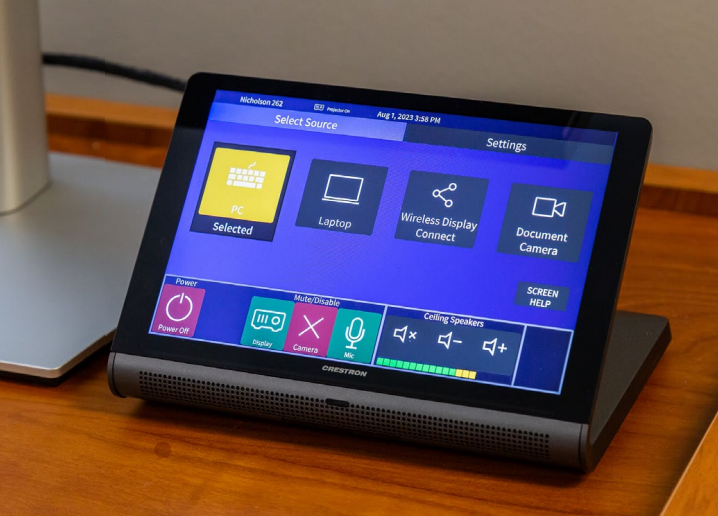
2. The Camera icon will turn red, and the camera will point up.
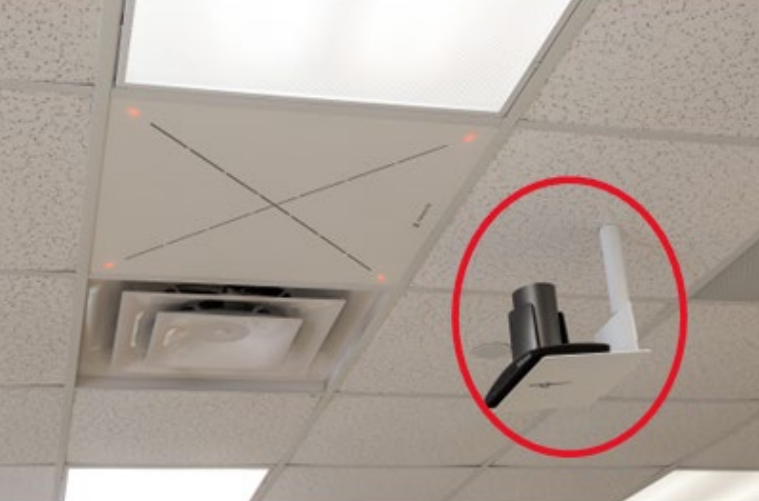
3. To restart auto-tracking, press the Camera icon again and it will turn green. The camera will begin tracking you.
[back to top]
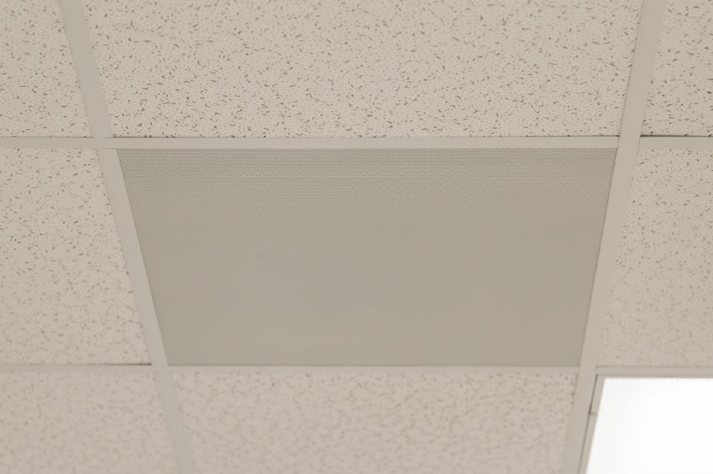
1. If you want to mute the ceiling microphone, press the microphone icon on the touchscreen.
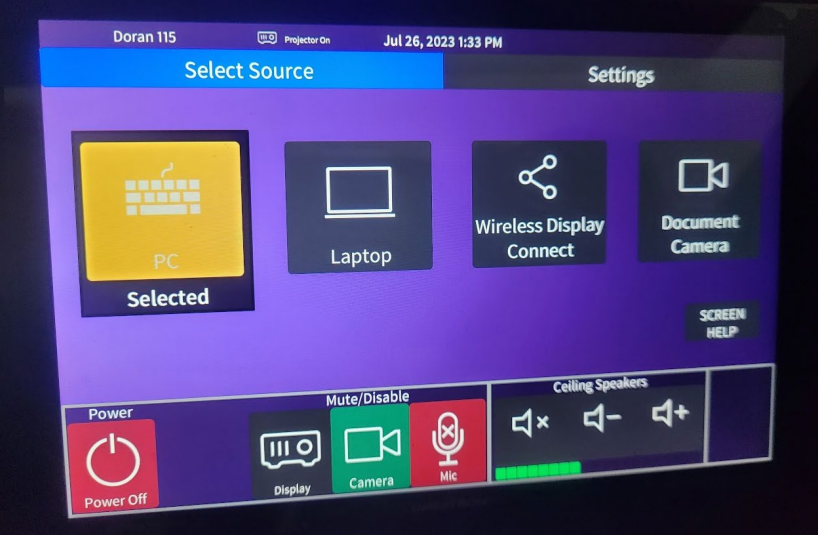
2. The microphone icon will turn red, and the ceiling microphone LEDs will turn red.
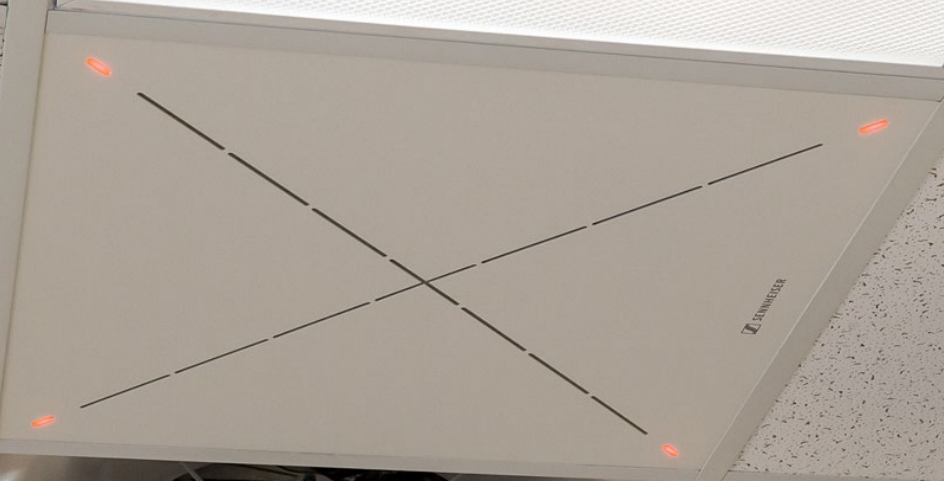
3. Press the icon again to unmute.
[back to top]
1. Touch the Ceiling Speakers icons to:
- Mute the ceiling speakers
- Increase/decrease speaker volume
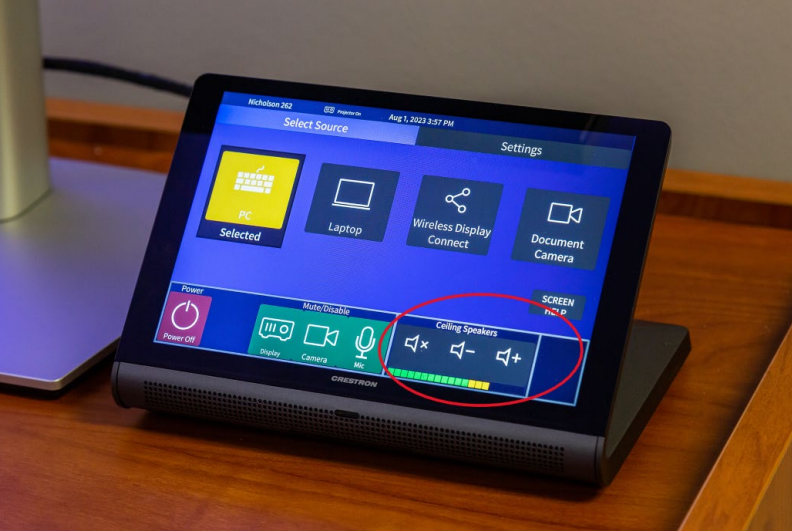
2. Test the ceiling speaker volume and adjust to the needs of the classroom.
[back to top]
1. After logging in to the classroom PC, connect a thumb drive to the USB extension cable on top of the lectern.
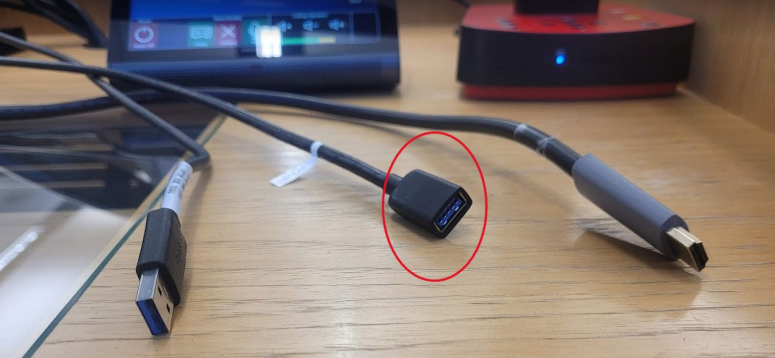
2. Open File Explorer and select the thumb drive.
[back to top]
1. Press the PC icon on the touchscreen.
2. Start your Zoom session.
3. Within Zoom, click the caret (^) next to Stop Video.
4. Ensure SimplTrack is selected for the Camera.
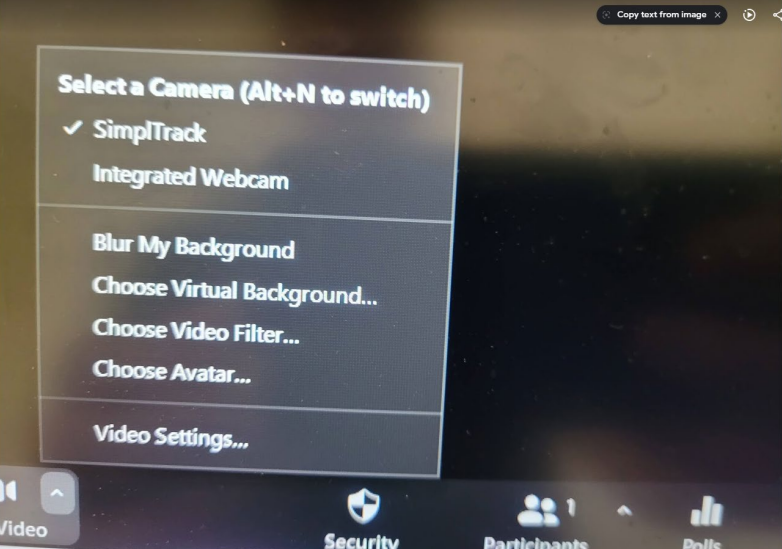
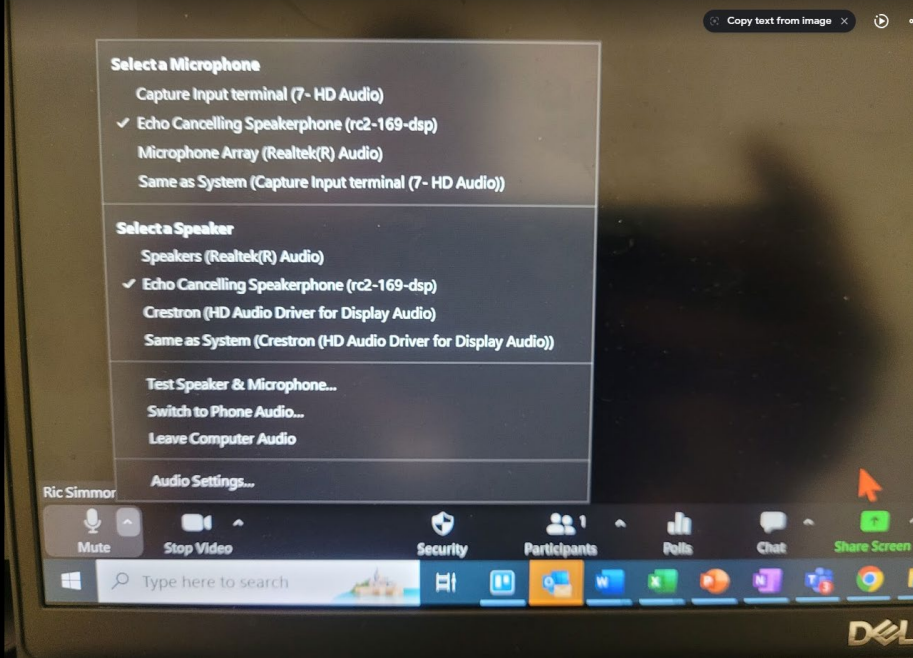
5. Within Zoom, click the caret next to Mute.
6. Ensure "Echo Cancelling Speakerphone (bldg-room-dsp)" is selected for both Microphone and Speaker.
- Note: Bldg and room will depend on your location.
[back to top]
1. Connect both the USB cable and the HDMI cable to your laptop or Macbook.
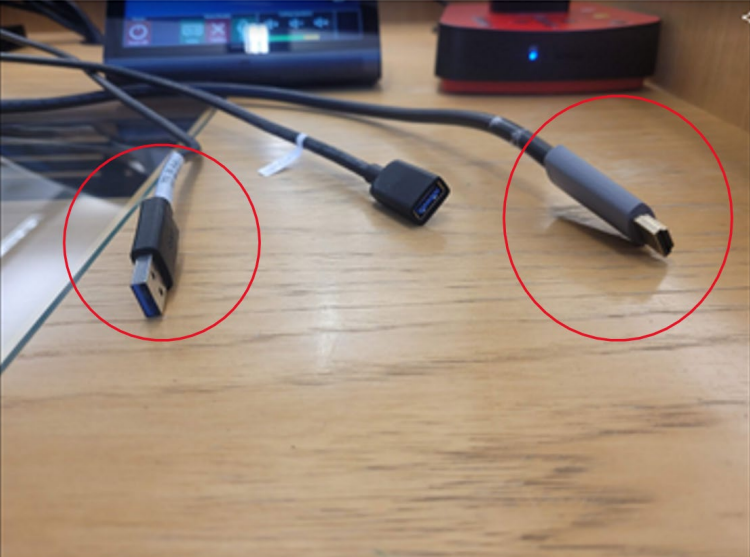
- Caution: Only use one adapter per cable - do not use multi-hub adapters for the 2 cables.

2. Press the Laptop icon on the touchscreen.
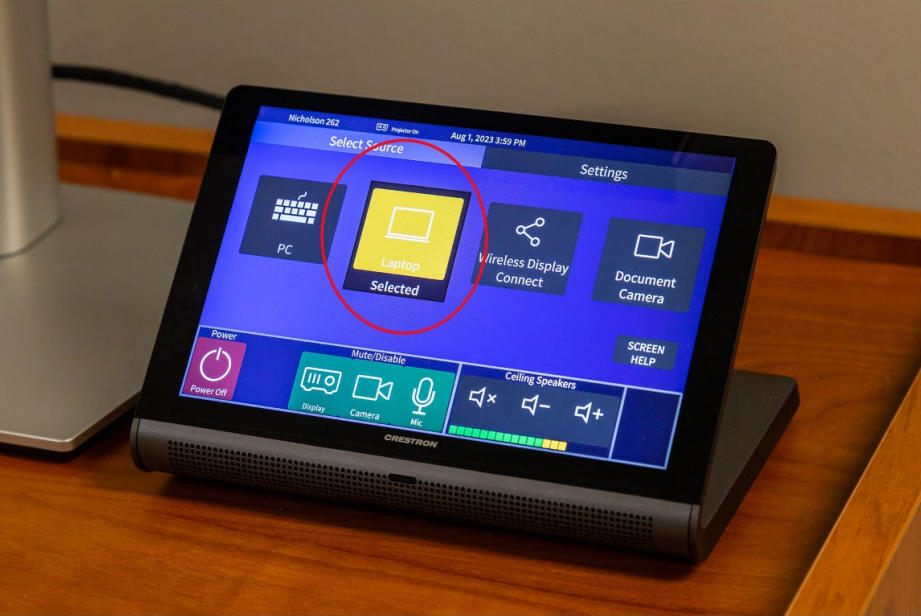
3. You can mute the display, camera, and microphone by pressing the appropriate icons.
4. You can control the ceiling speaker volume by pressing the Ceiling Speakers icons.
- Note: You may have to adjust your device's sound settings to select the room camera/microphone/speaker.
[back to top]
1. Connect both the USB cable and the HDMI cable to your laptop or Macbook.
- Caution: Only use one adapter per cable - do not use multi-hub adapters for the 2 cables.
2. Press the Laptop icon on the touchscreen.
3. Start your Zoom session.
4. Within Zoom, click the caret (^) next to Stop Video.
5. Ensure SimplTrack is selected for the Camera.
6. Within Zoom, click the caret next to Mute.
7. Ensure "Echo Cancelling Speakerphone (bldg-room-dsp)" is selected for both Microphone and Speaker.
- Note: Bldg and room will depend on your location.
[back to top]
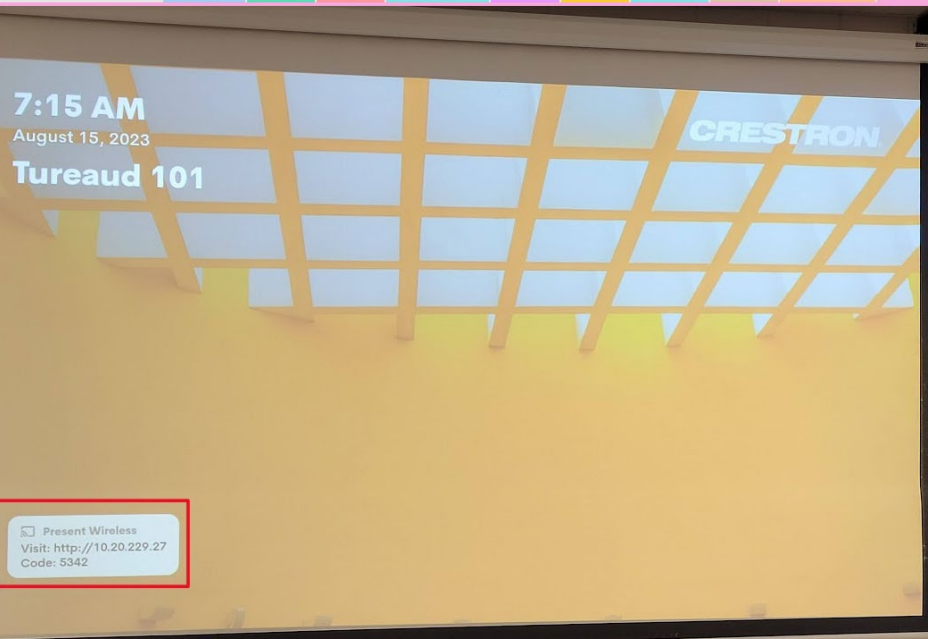
If you want a student to share content to the projection screen:
1. Press the Wireless Display Connect icon on the touchscreen.
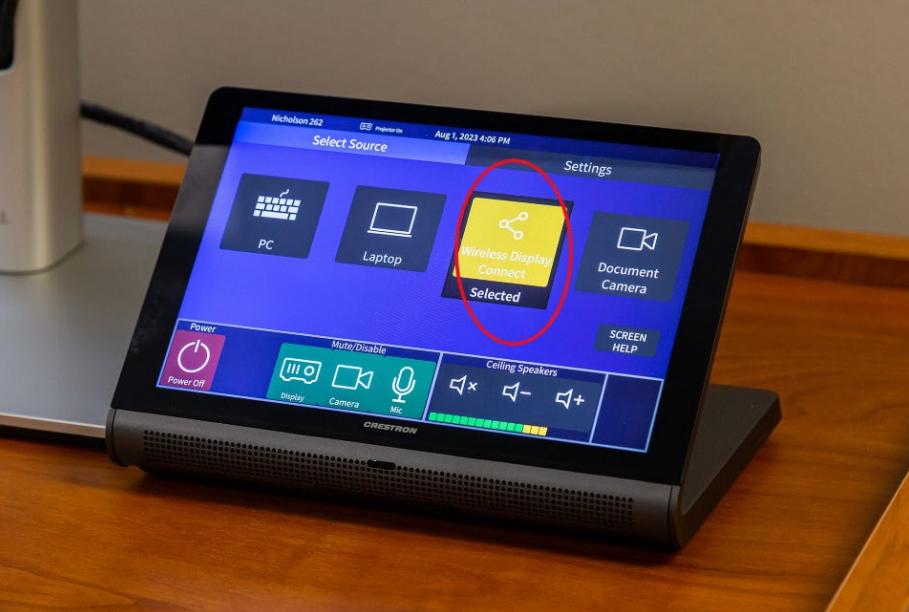
2. Student opens a web browser.
3. Student is prompted to download a Crestron app.
4. Student opens app and enters the information shown in the bottom left corner of the screen.
- Note: Student must be connected to eduroam.
[back to top]
To display using the document camera:
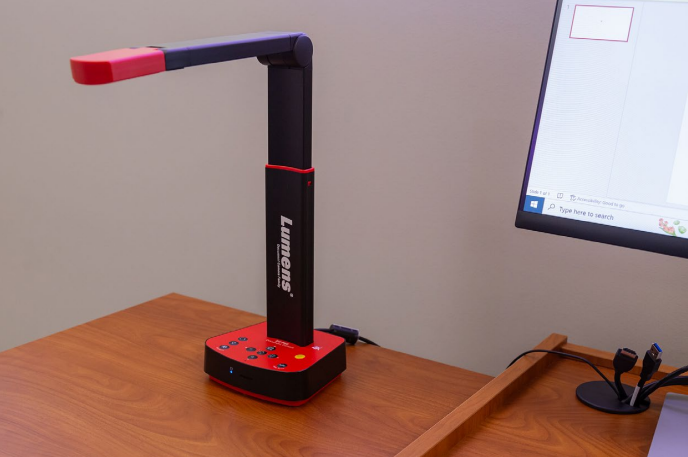
1. Press the power on button on the document camera.
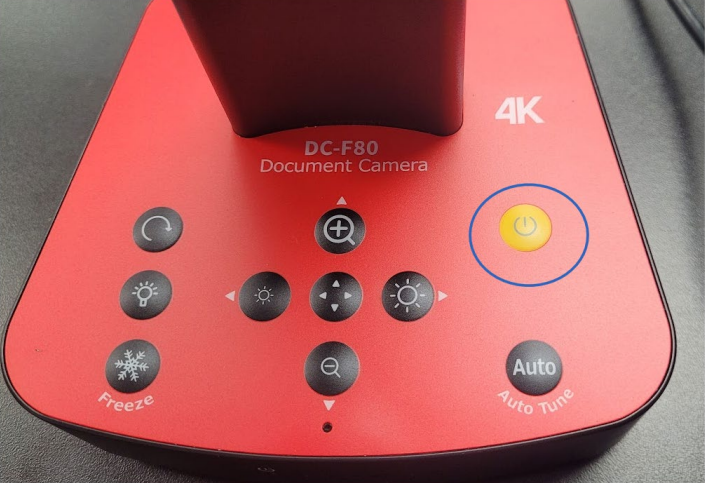
2. Open a camera application on the PC or laptop (e.g., Ladibug).
3. Select the Lumens camera option within the application.
- Note: You do not need to press the Document Camera icon on the touchscreen.
For a detailed PDF version guide of the new Tier 2 Classroom Technology, please see the following: Tier 2 Room Quick Start Instructions PDF.
[Return to Top]